- 3371 views
Cette application montre comment utiliser un module pont en H de type Pmod HB5 de Digilent et une carte Arduino™ Uno pour piloter un moteur cc.

Le module Pmod HB5 s'apparente à un pont en H capable de piloter un moteur à courant continu de petite et moyenne taille (avec une consommation max. de 2 A). Si vous utilisez un moteur Digilent il vous sera également possible de disposer de 2 broches supplémentaires sur le moteur correspondantes à la sortie d'un codeur de quadrature. Une carte Arduino™ Uno pourra être utilisée pour contrôler la direction et la vitesse du moteur en association avec un module bouton-poussoir Digilent de type Pmod BTN.
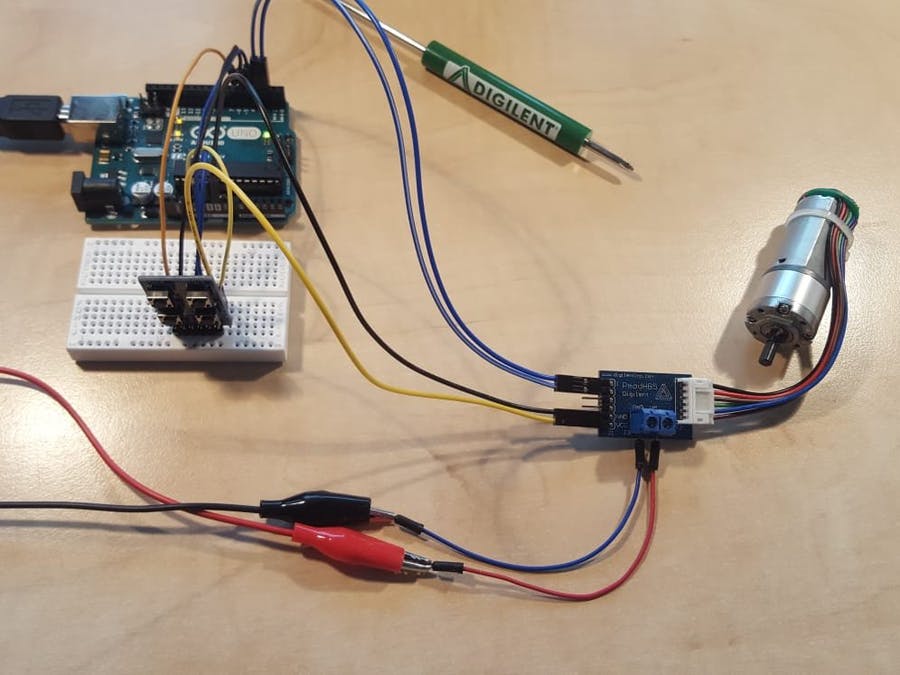
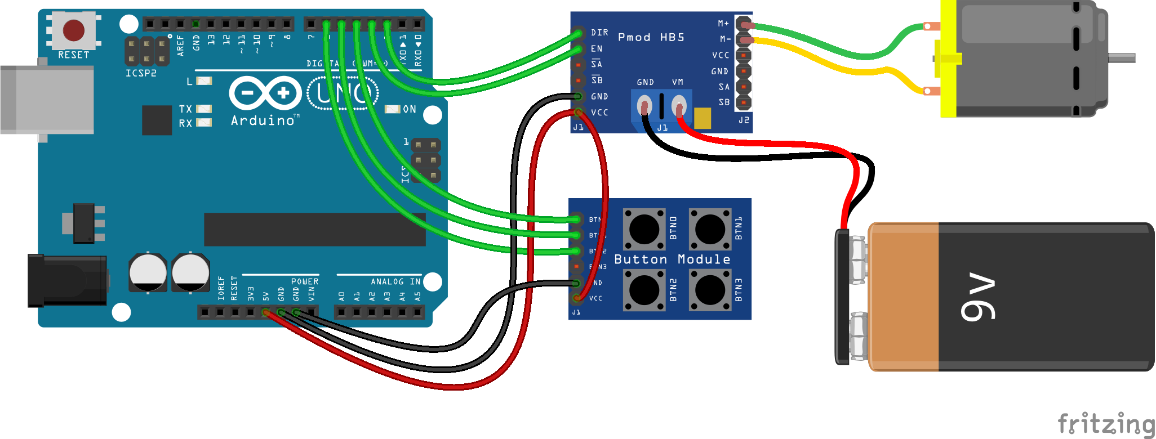
Tout d'abord, vous devez connecter le module Pmod HB5 et le module Pmod BTN à la carte Arduino™ Uno. Pour piloter le moteur DC, vous devez aussi connecter une pile 9V au modulePmod HB5.
Description du câblage:
Pmod HB5 <----------> Arduino Uno <----------> Pmod BTN
VCC à 5 V à VCC
GND à GND à GND
DIR à 2 à -
EN à 3 à -
- à 4 à BTN0
- à 5 à BTN1
- à 6 à BTN2

/************************************************************************
Test of the Pmods HB5 and BTN
*************************************************************************
Project description:
The pushbutton BTN0 changes the direction of the motor
The pushbutton BTN1 increases the motor speed.
The pushbutton BTN2 decreases the speed of the motor.
The motor speed is displayed on the serial monitor.
***********************************************************************/
//defining connections
#define DIR 2
#define EN 3
#define BTN_0 4
#define BTN_1 5
#define BTN_2 6
void setup() {
Serial.begin(9600); // Initialization of the serial monitor
pinMode(DIR, OUTPUT); // Configure DIR to an output pin
digitalWrite(DIR, LOW); // Set DIR Low
pinMode(EN, OUTPUT); // Configure EN to an output pin
digitalWrite(EN, LOW); // Set EN Low
pinMode(BTN_0, INPUT); // Configure BTN_0 to input pin
pinMode(BTN_1, INPUT); // Configure BTN_1 to input pin
pinMode(BTN_2, INPUT); // Configure BTN_2 to input pin
}
unsigned int spd = 0; //define motor speed as unsigned integer and set initial motor speed to 0
bool dir = LOW; //define dir (motor direction) as a Boolean variable and set initial direction to low
void loop() {
//read buttons
bool b0 = digitalRead(BTN_0); // Reading BTN_0
bool b1 = digitalRead(BTN_1); // Reading BTN_1
bool b2 = digitalRead(BTN_2); // Reading BTN_2
//increment motor speed by 5 if button 1 is pressed and spd is less than the maximum duty cycle (255)
if (spd < 255 && b1) {
spd += 5;
}
//decrement motor speed if button 2 is pressed and spd is greater than 0
if (spd > 0 && b2) {
spd -= 5;
}
//change direction if button 0 is pressed
if (b0) {
dir = !dir;
}
//control motor
digitalWrite(DIR, dir); //set direction
analogWrite(EN, spd); //Use PWM to control the motor speed
//display data
Serial.print("Motor speed: ");
Serial.print(map(spd, 0, 255, 0, 100)); //convert pwm to percentage
Serial.println("%");
Serial.print("Direction: ");
if (dir) {
Serial.println("counter-clockwise");
}
else {
Serial.println("clockwise");
}
delay(100);
}
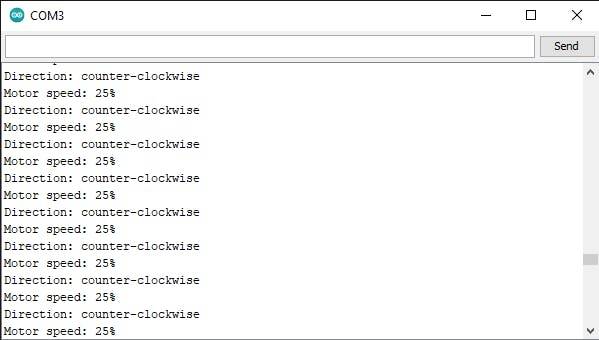
La direction et la vitesse du moteur sont affichées sur le moniteur série.
Crédits
@ Digilent - Alex Wong
